Building a Unity 3D Minesweeper Game Step by Step Part 1: Building the Scene
In this tutorial, we are going to try to build a 3D Minesweeper game in Unity. This is part 1. The complete project is here.
Minesweeper is a classic single-player puzzle game. The objective of the game is to clear all hidden “mines” on a board without detonating them. There are many variations of this game exist on many platforms. Most of them are 2D games. However, in this tutorial, we are going to make a 3D version.
In our scene, there is a character standing in a plane, which is built on multiple bricks. When the user touches a brick, the character will move to there. When the character steps on a brick, if there is a mine under the brick, the character stops walking and the health value decreases by one, otherwise, the number of mines around the brick is displayed above the brick.
First, create a new 3D project named “Minesweeper3D”.
Preparing the Brick Prefab
Create a Cube object in the sample scene, name it Brick and make it to a Prefab.
Next, we need to draw a texture on the surface of Brick. Download below two files and import them into the Textures folder:
Please don’t forget to download and import MinesweeperSpritesheet.png.meta except that you want to manually slice sprites from this sprites sheet by yourself.
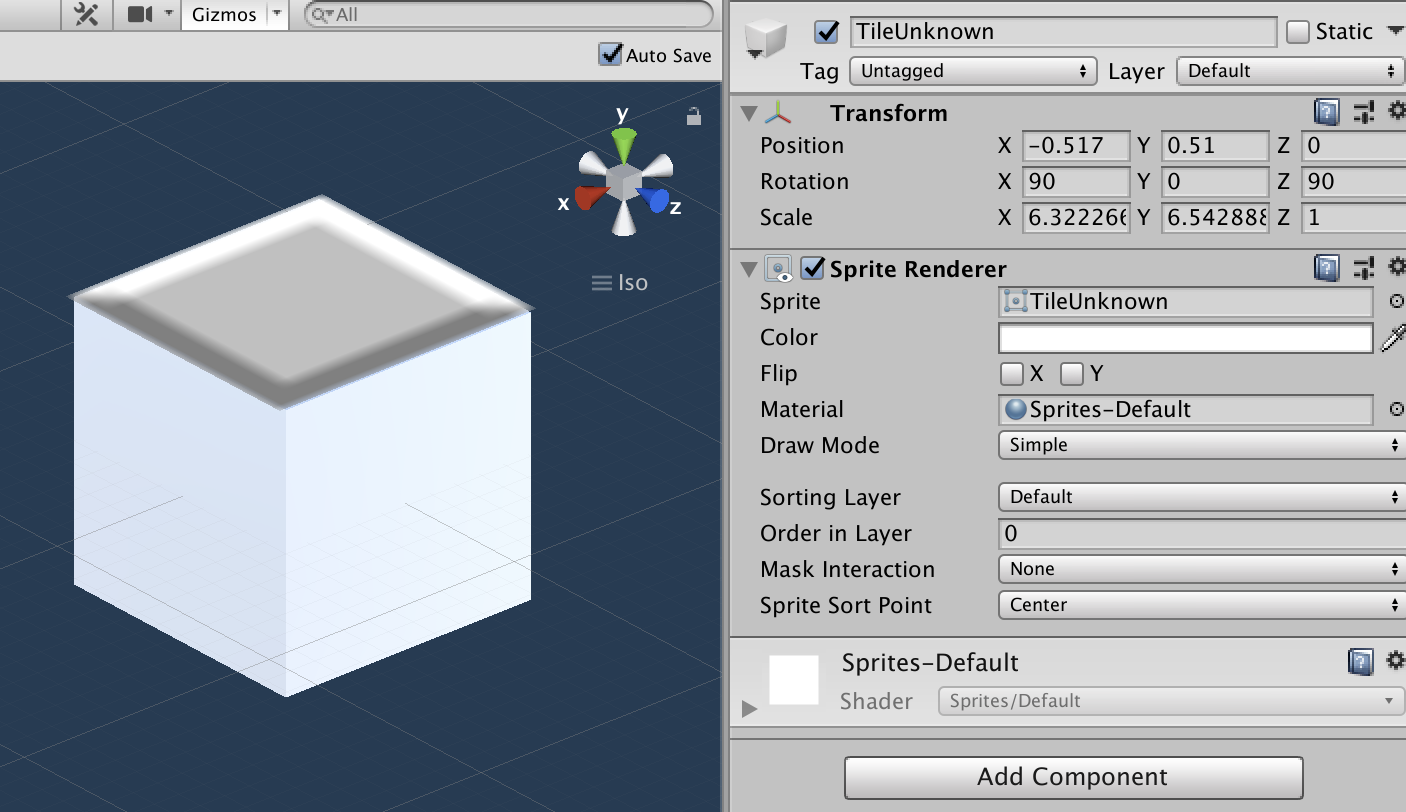
Drag the TileUnknown sprite onto the Brick object. Set the rotation of this sprite as (90, 0, 90), and adjust the position along the Y-axis as 0.51 so that let this sprite is a little above Brick. Adjust the scale of this sprite so that let it covers Brick just look like this:
Building the Scene
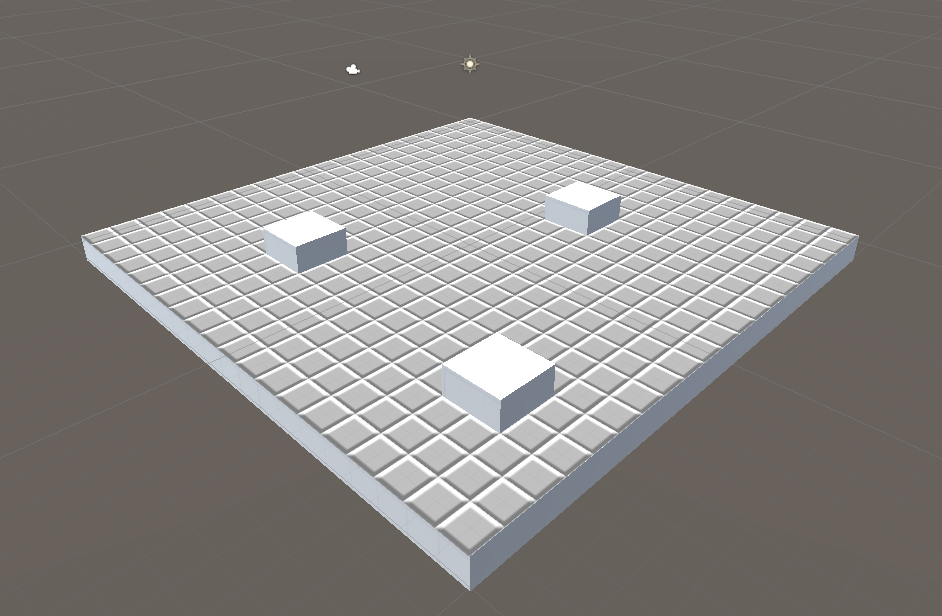
You can download the sample scene I made or build it by yourself. You can first make a grid of 20x20 bricks in the scene, and then delete some bricks and insert plain Cubes into those holes. These plain Cubes plays the role of obstacles.
Setting up the Navigation
We use the Unity NavMesh system to accomplish the navigation of our character.
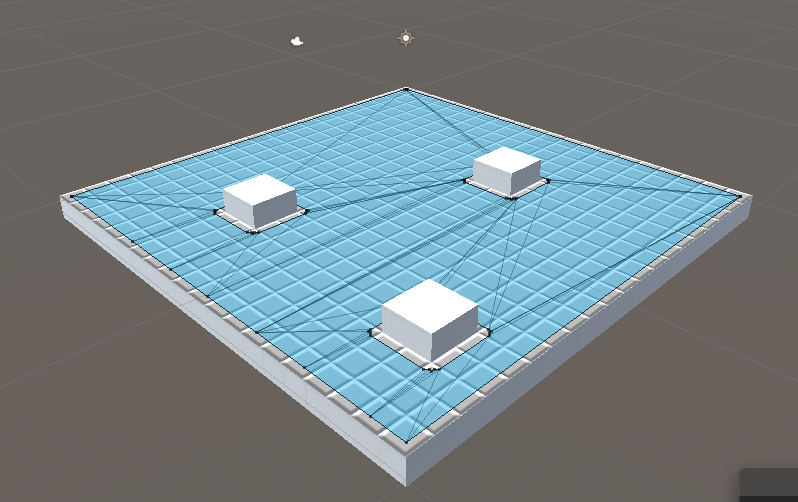
Open the navigation window (Window -> AI -> Navigation). Open the Objet tab, then select all Brick objects and obstacles and tick the Navigation Static checkbox. Set the Navigation Area of obstacles as Not Walkable. Next, go to the Bake tab, set the Agent Radius to 0.3. Finally, add the Nav Mesh Obstacle component to all obstacle objects, and tick the Carve checkbox of them. Click the Bake button, then we’ll see a blue navigation area:
Now, our first part of this tutorial is done, let’s take a rest and drink a cup of coffee.